Cron is a job scheduler in Unix-like operating systems. It enables users to schedule tasks (known as cron jobs) to run periodically at fixed times, dates, or intervals. These tasks can be anything from system maintenance to downloading file from the internet at regular intervals
What Is WordPress Cron?
WordPress has its own cron system for scheduling tasks such as checking for updates, scheduling a post for publication, and deleting comments from the trash. All cron jobs are handled by WP-Cron.
The default time intervals provided by WordPress are hourly, twice daily, daily, and weekly. Here, the time-based tasks depend on users visiting your site, meaning that WordPress cron will only execute if a user visits your website.
Note: WordPress cron is executed when the page loads up. Sometimes this isn’t that reliable, and that’s why many users prefer a server-level cron job over the WP-Cron job.
How to Manage WordPress Cron Jobs With Plugins
WP Crontrol plugin that allows you to view and control WordPress cron for your WordPress application. There may be many but I am familiar with this plugin.
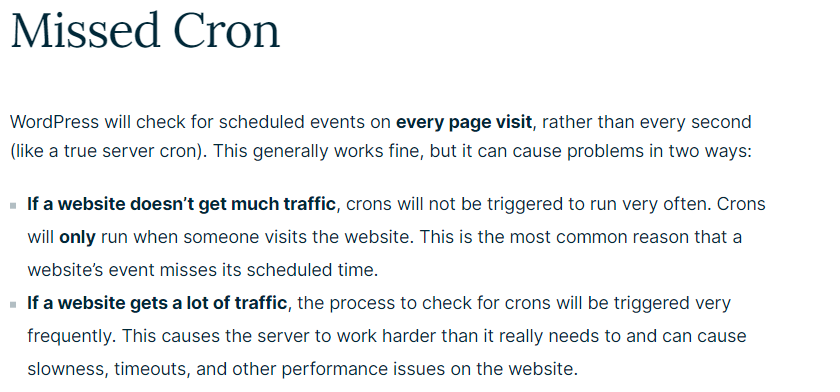
WP-Cron does not run continuously. By default, the wp-cron.php fires on each page load, which on high-traffic websites can cause issues. If a website doesn’t have sufficient PHP workers, sometimes a request will come in, and WordPress will produce the cron, but the cron must hold up for the worker, and so fair sits there.
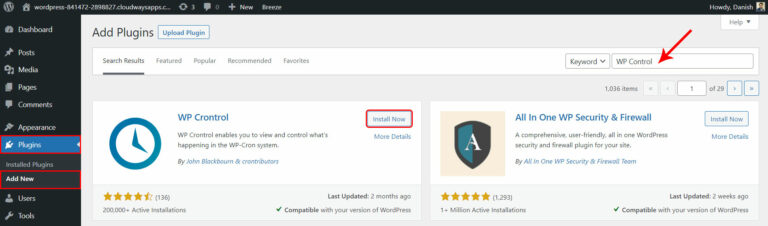
Step 1: Install WP Control Plugin
Just like any other plugin, you need to install WP Control from the plugin repository and activate it.
Once it’s installed, you’ll notice that a new option, “Cron Events” has appeared in the Tools tab.
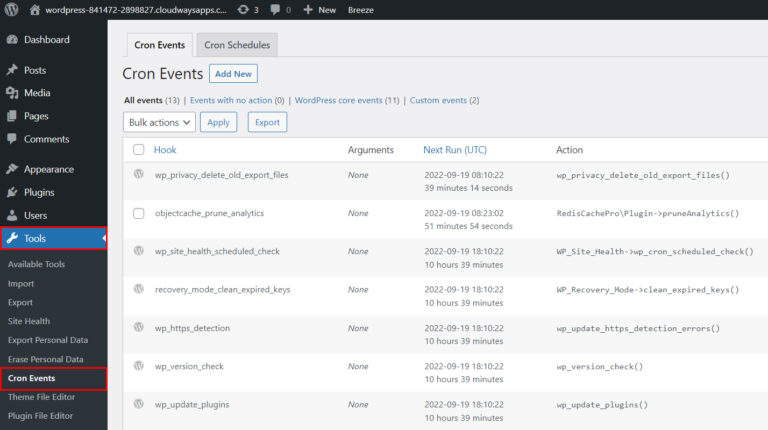
Step 2: View and Understand Cron Events
Next, you need to click Cron Events and see a list of cron events running on your WordPress application.
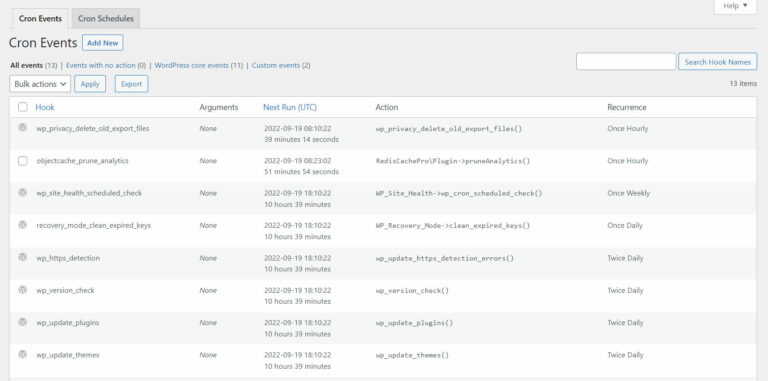
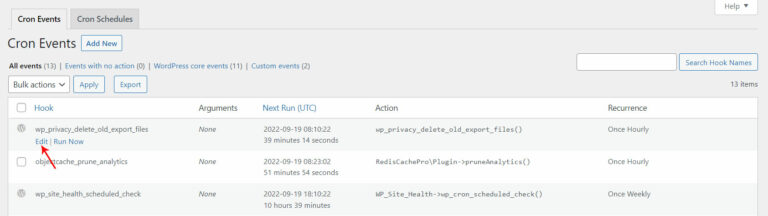
You can run, edit, and delete your cron events from this section. You’ll see this option when you hover your mouse over any cron event.
In the first column, Hook shows the name of the hook used by the WordPress core or any plugin. For instance, the prefix “wp” simply shows it’s a cron of WordPress core.
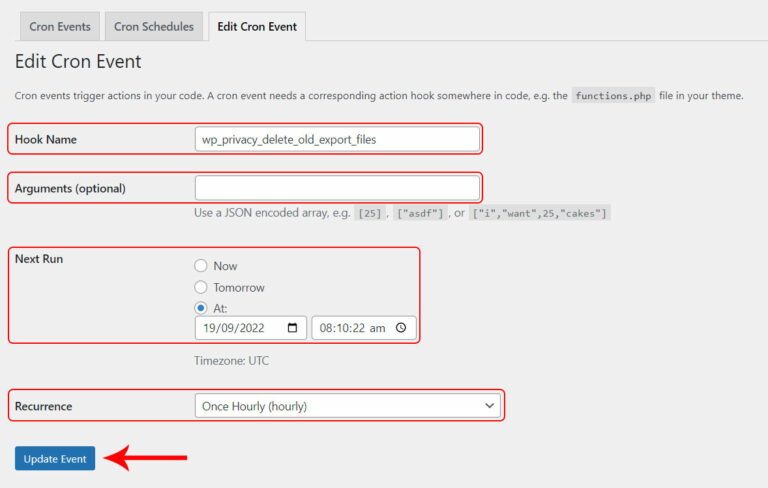
Step 3: Edit Cron Event
Now let’s edit a WP cron job to test this plugin.
Go to a hook’s name and click edit.
A new section, “Edit Cron Event” will pop up where you’ll see different fields. In my case, I edited the “wp_privacy_delete_old_export_files” hook
Next, I’m going to change the recurrence of this cron job to ‘Once Hourly (hourly)’.
Step 4: Adding a Custom Time Interval
Next, I’ll show you how to add a custom time interval for your cron events.
- Go to WordPress Settings → Cron Schedules.
- Now, click on the “Cron Schedule” tab, and a new screen will appear where you’ll see the details of the scheduled time intervals.
- Fill in the fields Internal Name, Interval Seconds, and Display name, and then click Add Cron Schedule.
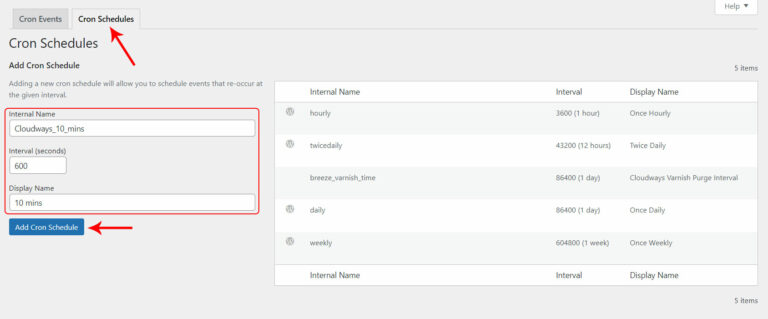
- Note that the input for the interval is in seconds. I will use 600 seconds to set the interval to 10 minutes.
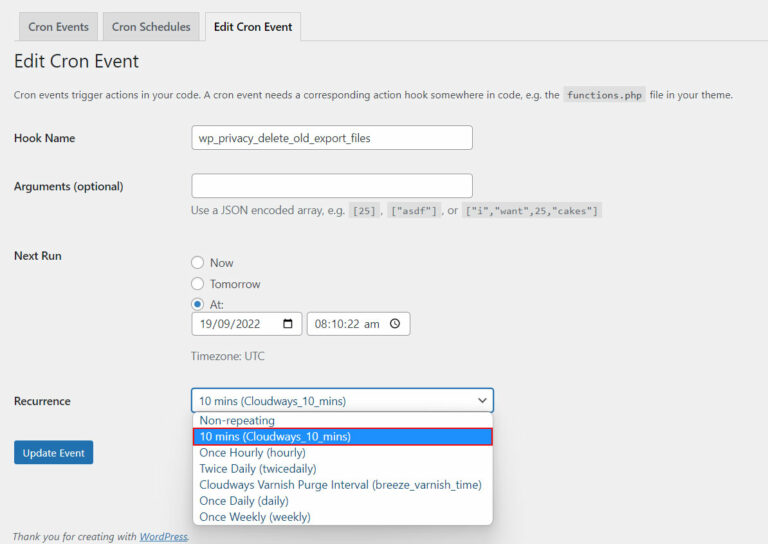
- You can now edit your cron event and replace it with your custom interval.
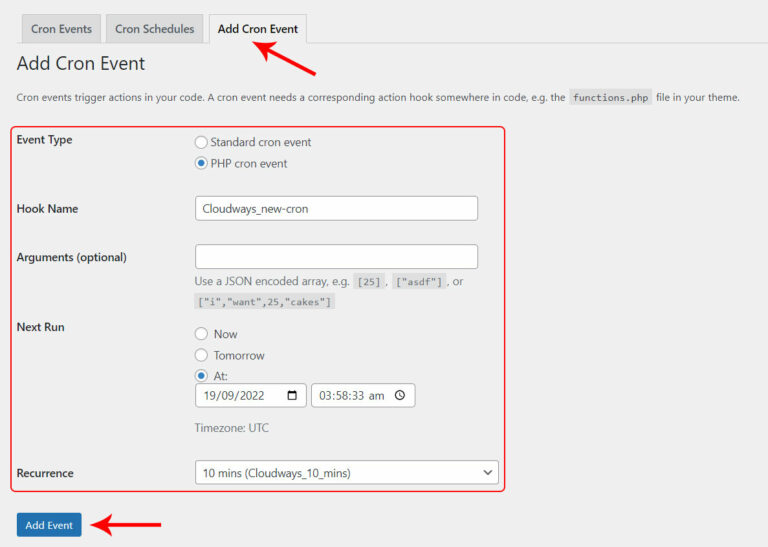
Step 5: Adding a New Cron Event
Now you know how to manage the simple tasks for your cron events but what if you want to add your own cron job for your WordPress application? Don’t worry; it’s so simple, and you must follow the instructions below.
- First, click Add Cron Event, and you’ll get into the add cron section.
- Then, just give a hook name as you wish (should follow normal PHP naming convention and no spaces).
- Then, add arguments (it’s optional); in my case, it’s blank.
- Next, select any option, and put a time in the Next Run field.
- Last, choose a recurrence time (schedule time) for your new cron and click Add Event.
- If you have any queries regarding this, you can check any running cron job settings from your cron events.
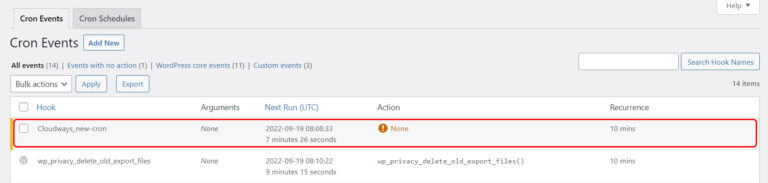
- After adding a new cron job then, go to the cron events tab and check your newly created cron. You’ll notice that the action column will show you None (error). This is because you haven’t defined any actions for this cron job.
- Therefore you need to write a few lines of code in the functions.php file of the theme and add an action.
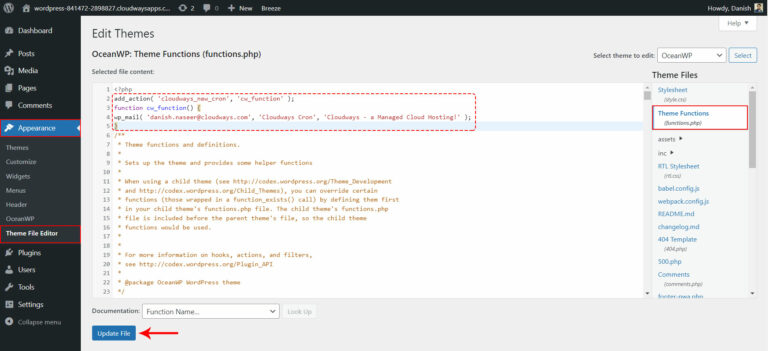
- Go to WordPress Dashboard → Appearance, and click on the Theme File Editor.
- Click on the function.php file from the Theme Files option on the right side of the page.
- Add the following lines of code right after <?php into your theme’s function.php file
    add_action( 'cloudways_new_cron', 'cw_function' );
    function cw_function() {
    wp_mail( 'abc@gmail.com', 'Cron Job Testing', 'Cron Job Testing Correctly' );
    }
Next, check the email inbox and see whether we’re receiving the message.
But there one problem:
How to solve this: Create a rest api call and add that call to server cron.
Resource I used in this blog
Reference: https://developer.wordpress.org/plugins/cron/
Reference: https://www.cloudways.com/blog/wordpress-cron-job/
Reference: https://kinsta.com/knowledgebase/wordpress-cron-job